July 31, 2014

Better Late than Never (Right?)!

Remember that dress I mentioned waaaaay back in April?  The bridesmaid one?  The bridesmaid dress for my friend that was seven months pregnant?  Well, three (almost four) months have passed now and 3(ish)+7=10 and guess what?  That sweet little girl is almost two months old now!  What does this mean for that dress?  That I never got over there to take pictures and the baby bump is gone so there's no point in trying to get them taken now.  I know, I REALLY need to work on my timing (but don't worry, my always-early-housemate is aware of this issue and I'm always reminding her we have seperate cars- hehe).

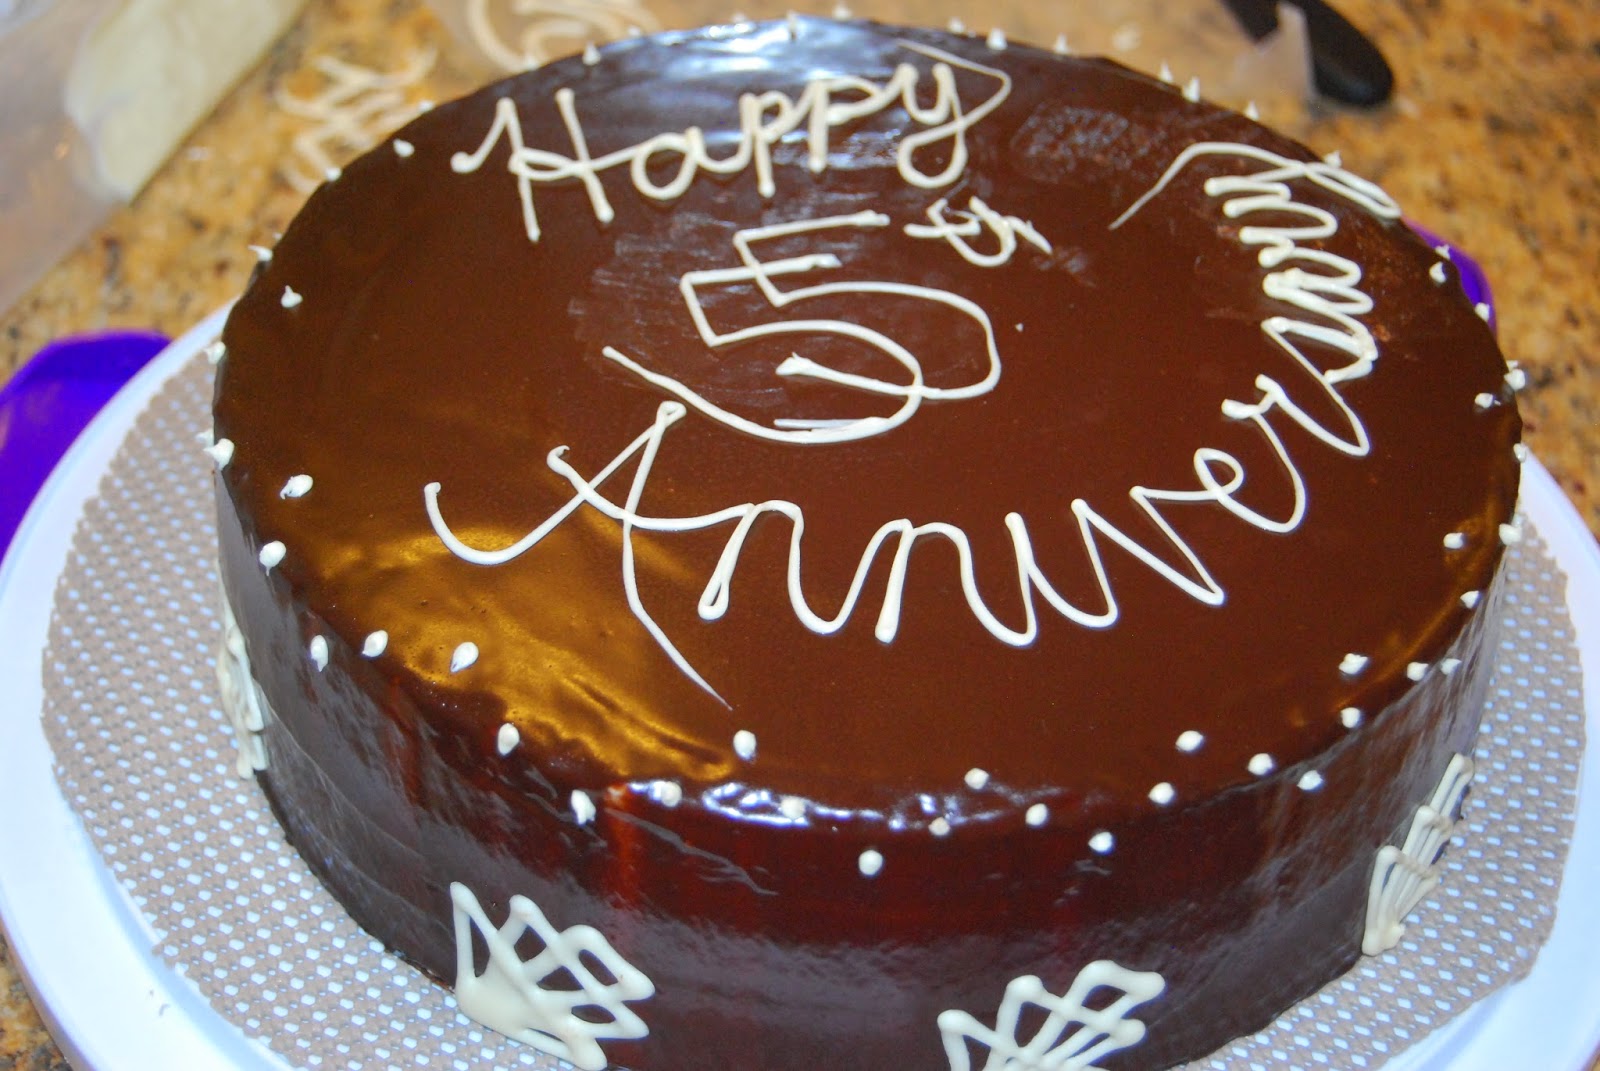
Anyway, I have a few pictures of my previously pregnant pal at the actual wedding I can share and some of the final muslin, but you'll just have to believe me about the nitty-gritty details.  Also- fair warning, this will probably be a wordy post.


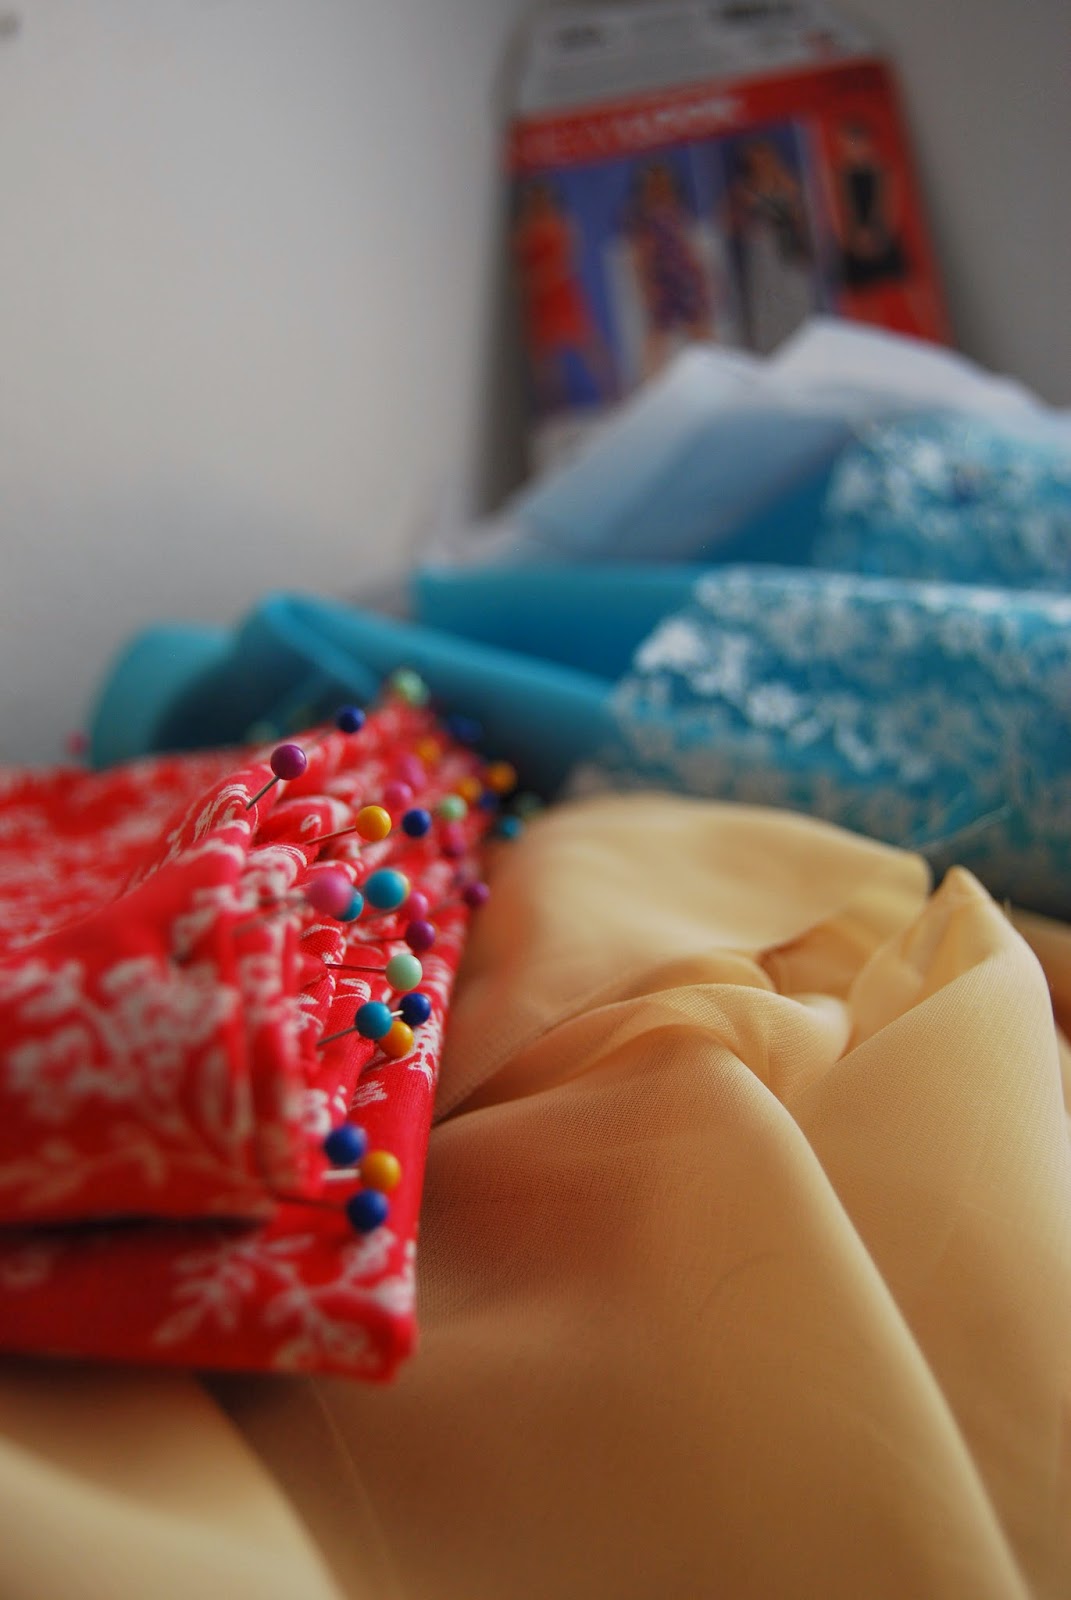
So the pattern was New Look 6864.  The fabric was 100% polyester in Scarlett from Joann Fabrics, the main fabric was polyester satin and the overlay was a polyester chiffon.  I'll share my thoughts about polyester later in this post.

I started with a straight size 8 since my friend is normally a size 2 when not pregnant and I knew there'd be extra ease since New Look is part of Simplicity, a Big-4 company.  Well, that extra ease was not enough for mama and baby belly.  I measured how many inches I was short along the back where the zipper would be (and where the dress wouldn't close).  Taking those measurements, I added them to the given measurements for the size 8 and ended up all over the place.


The next muslin I decided bigger was better.  I cut a size 12 for the bodice, graded to a size 16 for the waistband and size 18 for the skirt, but I kept the length of all pattern pieces at the size 8 because that was the perfect length for her baby bump (does that make sense?).

This dress was way too big, but I was ok with that!  At that fitting, I pinned the back shut and all down the excess at the back of the skirt.  I pinned the extra on both side seams under her arms and it happened to line up perfectly at the bottom of the waist band so there was no need to grade down the skirt's side seam.  Now this part is real tricky- I took a Sharpie and marked along everything I had pinned- really hard, right?  At home I measured from marked line to seam line and marked that onto my pattern piece.  Because (pretty much every seam) had two Sharpie lines, one on each side seam/back zipper line, I ended up with two different measurements per pattern piece.  So I literally went in between the two marked lines and cut down the middle.

After cutting out my new pattern pieces I made my final muslin, but I was really hoping this would work so I took a chance and used some nice cotton- in hopes of this one being a wearable muslin.  It was, yay!  I only had enough of the cotton for the main dress, not for the the bodice lining.  I used a soft white cotton for the inside and decided to be persnickety with my thread.  The thread on the outside matched the main fabric while all the inside stitching on the white lining was also white.  Yeah, you see some pride sneaking out here.


Anyway, there was only one spot on the final muslin that needed adjusting, the upper right back bodice where it attaches to the neck band.  It was pretty easy to just adjust that by moving my seam line on the final garment.


Now, the final garment.  It. Was. A. Pain.  I don't like polyester, Sam I Am!   I do not like it in a boat, I do not like it with a moat or goat or a house or a mouse or on a train, plane, in the rain- however that is supposed to go.  Polyester does not press, like, at all.  Polyester satin and chiffon shift around sooooo much and be careful with your pins cause they leave marks.  Also, it doesn't press.  Did you know it's virtually impossible to get a decent crease or seam allowance to stay on whatever side you want it on because it doesn't press.  I'm pretty sure I had cartoon thunder clouds around my head from my frustration and growing irritation.


There's one part on the skirt where it's gathered and attached to the bodice that some of the skirt fabric got caught and stitched into the gathering.  It almost looks like a pleat.  I tried to unpick it so it could be redone nicer, but the fabric wouldn't cooperate and played hide and seek with my stitches- so a pleat added into the gathering it was!  I think (hope) I'm the only one who noticed.  I also decided to be lazy on the skirt overlay and not adjust the tension for the thinner, sheerer fabric.  The result was slight puckering that I hadn't even worried over until I saw the dress on my friend while standing up with the other bridesmaids (in their pucker-free J-Crew dresses).  Lesson learned I suppose.


 The chosen dress had a deep V/notch  in the neckline but because of the heavy. thick fabric, one side had a hard time staying up and not flopping down.  The solution to this became to sew the top of the V together to create a keyhole.  It was a nice detail that many ladies noticed and commented on (positively, I might add- hehe).  I've also come to discover that I cannot sew zippers that have been pinned into the dress.  None of my seam lines will match.  I HAVE to hand-baste my zippers in to get matching necklines and waist lines.  It's a pain while I'm doing it (unless it's embroidery, I'm not a fan of hand sewing) but totally worth it in the end.  One last thing- hook and eyes.  They are mischievous little notions.  Anyone have any tips for sewing them in easily or at least neatly?


All in all, it was a good experience and ended pretty well.  I didn't think I would do anything like that again anytime soon, but that was before I realized the difficulties I have saying "No freaking way!" to people.  Cuz, ya know, I totally made my roomie's Comic-Con costume.  But that's a story for another day.

June 10, 2014

It Must Be Wedding Season

I've (hopefully) learned three things since my last post:

-I get more involved in weddings than I think I will be
-I underestimate how long wedding projects will take
-I can't write blog posts and work on wedding projects in the same time period

This wedding was pretty special, so I'm not sorry for the length of time I've spent ignoring this blog in favor of working on wedding stuff.  You'd probably feel that way too if your mom was getting married!  Did you guys catch that? MY MOM GOT MARRIED!  It was definitely a special weekend spent with family to celebrate and cherish my mom and her new husband.  Also, it's kinda weird (in an amusing way) that my mom no longer has the same last name that I do.  She went from being a Mrs. D to a Mrs. H- at least we're still in the same half of the alphabet...

I volunteered to make the wedding cake for my mom's wedding.  She had made a Pinterest board with ideas she liked that included some wedding cakes, so I tried my hardest to go with a style she liked... kinda.  The requirements were two tiers, coconut cake for top tier, marble cake for second tier, no real sea shells.  Really, that was it.


I realized as I was mixing the blue frosting that none of the pictures my mom had on her Pinterest board had blue frosting, they were mostly neutrals, cremes or white.  By that point I had already mixed the whole batch of frosting blue and wasn't about to make a whole new batch just to waste blue frosting.  Also, I wanted to make it totally beachy (which was in line with her theme and pictures) and what's more beachy than the ocean? 


I used crushed graham crackers for the sand on the top of the second tier and on the cake board.  I hadn't intended to dye my second tier frosting to match so closely with the "sand" but as far as frosting tints go copper looks more like salmon and brown just made it muddy-ish so golden yellow was added and voila- sand colored frosting was born.  


The sea shells were made using candy molds and those meltable candy chip thingies (not white chocolate like my family kept telling one another).  I used shimmer pearl dust in gold, bronze, red and blue and a (new) paint brush to color them.  I tried to make each one unique and with different color combos.  While I thought some of them looked funny on their own, thankfully they looked good on the cake.


I knew I wanted to try to make the top tier look like water but I couldn't figure out how at first.  I had frosted the cake in plain blue but made it textured instead of smooth to emulate waves.  I then attempted to pipe a wave design on top of the bumpy blue frosting and it looked hideous.  I was being lazy in deciding to swirl the white hideous piped frosting in with the blue instead of taking it off, and that's how I ended up with my ocean.  I'm grateful that what could've been a disaster ended up being just what I wanted.


I tried piping a shell motif onto the sandy frosting, but again it didn't work.  I didn't like it and here's a secret- I can't draw a straight line, let alone cut one, walk one or pipe one!  So I carefully scraped that off and left it alone while I thought of something else.  The night before the wedding (in the hotel room, of course) I decided on these little scrollie things and dots.  Sugar pearls (or whatever you call them) seemed to be appropriate and added a nice touch.


I finished coloring the sea shells the morning of the wedding (yeah, I brought a ton of cake stuff with me to the hotel cuz I couldn't finish it before I left if I was to arrive in time to join in for mani/pedi's).  My nieces were in the same hotel room with me and had a little fight over who got to blow the extra dust off the sea shells (while I held them out of spitting distance, of course).  The fight ended quickly and without any casualties, so it was more cute than anything else. 


Driving three plus hours with a wedding cake frosted and assembled in my car was nerve wrecking.  I read some tips about transporting a cake on Sweetapolita that I took a chance with and were really helpful (although I doubt she meant for her tips to be used on that long of a drive).  On the bottom of my passenger side floor, I used the rubber grip stuff then placed my cake (which had a dowel all the way through both tiers as well as dowels on the bottom to support the top tier) on the floor on top of the rubber grip.  The cake was too large to just be able to place down onto the floor, I had to tilt it at an angle to make sure it cleared the bottom of the glove box, but it held steady.  I used a large black trash bag tucked into my glove box and draped over my passenger seat to prevent the sun from shining on the cake.  I had my A/C on the whole time, on either the feet only setting or feet and dashboard depending on how cold my feet were getting.  The black trashbag makes a nice insulator and keeps it wonderfully cool where the cake is.  I will definitely be using these tips again!


The top tier is a three layer, 10 inch coconut cake.  I had to try four different recipes to get a coconut cake that had a nice texture and tasted like coconut.  I actually ended up modifying the recipe quite heavily, to the point where I'm pretty sure it's a new recipe now.  


The bottom tier is a three layer, 14 inch, vanilla/chocolate marble cake.  I only had one 14 inch cake pan so I had to wash and re grease/flour it in between baking each layer.  While pouring my last layer into my cake pan, I noticed I had only greased it, not floured it...  UGH!  I poured the cake batter out, re-washed it AGAIN and actually floured it after I greased it this time.  I decided to take a chance with the cake batter I had poured out of the pan, thinking that a little extra grease (shortening) wouldn't hurt it, so I poured it back in.  It baked fine, it just didn't look marble-y.  Oh well.


It happened to be my grandparents' 55th wedding anniversary on the day my mom got married, so one of my aunts asked if I would make them their own anniversary cake.  My grandma is gluten free, so this cake had to be gluten free for her and chocolate for my grandfather.  I found this great recipe on A Girl Defloured.  Actually, I tested it on my Bible Study, not telling them it was gluten free.  They all raved about it (then laughed after I told them it was gluten free) so I decided I had a winner here.  I even used the recipe with normal flour for my chocolate part of the marble cake then adapted it more to be my coconut cake.  I covered the stacked cake with a crumb coat, then after it set I poured chocolate ganache over the whole thing (since ganache is pretty stable in warm weather once set).  I decorated it with temperamental white chocolate (my fault, i melted it in a pastry bag because I didn't have a bowl) and called it good.  The people who tried all three different cakes agreed that this one was the best.  Now I just need to find a vegan/gluten free cake recipe for my sister's birthday in a few weeks!


Because I had such a hard time finding a coconut cake recipe (most of them ended up being white cake with shredded coconut for decoration), I thought I would share what I ended up using.  So here's my recipe for Coconut Cake:


Coconut Cake

  • 1 1/2 cups Sugar
  • 2 cups Flour (I used AP)
  • 1/2 cup Finely Chopped Coconut
  • 1 1/2 tsp Baking Powder
  • 1 1/2 tsp Baking Soda
  • 1 tsp Sea Salt
  • 2 eggs
  • 1 cup Coconut Milk (I used canned light coconut milk since it's thinner than regular canned coconut milk)
  • 1/2 cup Vegetable oil
  • 2 tsp Coconut extract
  • 1/2 tsp Vanilla Extract
  • 1 cup Boiling Water

Preheat oven to 350 degrees (Fahrenheit), grease and flour (or spray) your cake pans (two 8 or 9 inch round pans). Combine the first 6 ingredients (sugar, flour, coconut, b.p., b.s., salt) in a bowl.  Combine the eggs, coconut milk, oil and extracts in a separate bowl, mixing so the eggs are beaten lightly.  Add your egg/milk mixture to you flour mixture and combine until there's no more flour visible and mostly smooth (the coconut is going to add texture/lumps).  Pour your hot/boiling water into batter and mix/whisk until it's all incorporated.  Divide your batter between your cake pans and bake for 30 mins, or until top is golden yellow (NOT brown) and tooth-pick comes out clean.  Let rest in cake pans for 10 minutes before dumping out onto a cooling rack.

I found that assembling and frosting the cake, then letting it sit overnight (in the fridge or covered in a cake dome) lets the coconut flavors develop better/deeper than they would if you were making and eating the cake the same day.

May 15, 2014

Divided Basket #2

While visiting my mom, I subbed in her monthly game of Bunco.  Everyone brings a prize or gift so everyone goes home with something.  I got the text saying I was playing Bunco two days before I left to come visit.  The theme for gifts was Summer.


I really didn't want to spend money (I kinda splurged recently on some patterns and shoes), so I decided to make another divided basket (first one here).


By the time we had finished cleaning and organizing her craft room (and I had washed off the grime) I only had just over an hour to get this made.


I tried to do as much of the same thing at the same time to avoid things like going-back-and-forth-wasting-time.  I ironed all the interfacing on first then sewed as much as I could of everything before I needed to iron again.  It worked pretty well, I feel as if I was quite efficient.  


The only thing I'm not happy with is my top-stitching.  It's shoddy and I was totally rushing.  The layers of fabric and interfacing get really thick and where the handles are it's even thicker.  When I was trying to maneuver the divider around the bottom of my sewing machine I forgot to make sure my needle was down and I moved my basket all kinds of crazy ways.  I then had to try and line up my top-stitching again.  It's definitely not even.


This is the only picture that accurately shows the color of the green gingham.  I didn't have time to take pictures before we had to leave for Bunco, so I took pictures in my mom's car while we were driving there.  No judging please, I already know I'm crazy.

I have another basket I need to make this week for a baby shower this weekend, but I'll definitely be taking more time on the top-stitching this time.  I already have the fabric for that one and it's going to be so cute that I can't wait to see it all put together.

May 13, 2014

A Blast from My Past

This past weekend for Mother's Day I went to visit my mother (cause I like her and she's my mom and stuff).  She wanted to organize and rearrange her craft/guest room while I was there, so we were busy all day.  While going through some of her fabric, I thought some of it was quite hilarious and had to share.


I haven't seen these cut-and-sew panel thingies in years but looking at this particular one, I think I'm ok with that.  My mom  wants to inform you all that I just about died with laughter after finding out the circles around the vest are to make yo-yo's to go ON to the vest (supposedly embellishing it).  She threatened to make it and give it to me as a gift.  She has an awesome sense of humor.


Star Trek fabric!  I look at this piece and remember all the years of watching Star Trek because with my dad in charge of the TV, it was that or nothing.  I guess you can find just about anything these days, but this was bought at least 15 years ago.  That makes it almost vintage for sewing.


My mom says this is Daisy Kingdom fabric.  I remember when my little sister was about 4, I found a Daisy Kingdom dress at a garage sale around the corner from home and brought it home for her.  That's about the extent of my Daisy Kingdom experience besides a few patterns found in bargain bins at the fabric stores (except my mom just informed me the vest up above is also Daisy Kingdom). 


We found some vintage UFO's in my mom's craft room too.  Like this blouse.  She has it all finished except buttonholes and button.  I actually tried it on and think it'd be cute over a shirt with a single button to keep it half closed.


The neckline has this cute curve that looks like it should be folded over/ironed into a lapel.  I think the print is super cute and this shirt is totally wearable (so she should finish it).


Here's another UFO of my mom's.  I feel I should mention that both of these were made when I was really, really little (read over 20 years ago). This one is a button-down midi-skirt with patch pockets.  I've totally seen these coming back into style, yet another wearable garment- if it were finished.  


She's already finished the hard part in my opinion- all those buttonholes!  I think I counted 8 total, that's 8 more than I'm usually willing to do (I'm a big fan of sewing clothes with closures that don't involve buttonholes).


It's even marked where the buttons need to go.  The ONLY thing not done on this skirt is the buttons.  I vote this one should be finished too.


This is actually one of my unstarted projects from elementary school.  We used to have a dress code before uniforms at the school I attended and I was going to make this dress (view B).  There was another girl in my grade who wore dresses with buttons and sleeves and I usually wore jumpers.  I wanted my own dress with buttons and sleeves so I intended to make this one.   Obviously it never happened, the fabric didn't even get cut.


A close up of the fabric I chose in 5th grade.  I still like it!


I adore this fabric.  Look at how much cuteness is contained in one cut of cloth.  Those airplanes kill me!  I can totally picture this made into a little boys shirt with the airplane stripe going across mid-chest.  


This is the phone pic my mom snapped for Facebook.  I think we did a good job.  Lots of work but now it's a space capable of lots of fun (sewing- duh!).  I also cleaned and organized my own room right before I drove to my mom's (no pics, it's boring), but now I better cool it on the cleaning front before my housemate expects me to start picking up my crafting projects.  Hehe.


May 8, 2014

Wardrobe Architect

I stumbled upon a blog a few weeks ago that was going through Colette's Wardrobe Architect.  I was intrigued so I went exploring.  At the time I thought it sounded interesting, but not for me.  

Today I got out of bed and could not find a single thing to wear:  
t-shirt- too clingy or too thin or doesn't fit or wrong length sleeves...
skirt- too short for today's weather
blouse- I only have one and it's stained (why do i still have it?)
jeans- only have one pair and they're in the laundry pile
dress- don't feel like it
sweater- I wear that one too much already, but hardly any of the rest


Piles and piles of clothes reside between my floor, my closet and my dresser, yet I can't find anything to wear?  I admit to having I-don't-like-my-body-fat-to-show-itis most days, and today I had a major case of it. That only increases the guilt I feel looking at my plethora of clothes that I know I'm being quite ungrateful for.


I went to my collection of patterns next, thinking, "If only I had a shirt I wanted to wear, this could be fixed."  After quickly looking through my paper patterns I pulled one out to trace so I can get started on a muslin.  Then I go through my fabric stash to look for the perfect fabric to pair with this pattern:  
-that one needs washed still
-that one is too heavy
-I don't like that print for me
-those are saved for the nieces' Christmas dresses that didn't get sewn
-that one I bought to go with another pattern
-that one is too expensive to use on a shirt
-that one I really like and am therefore afraid to use...


This sounded all too familiar... because I had already done it this morning with my clothes!  Honestly, I was so disgusted with myself.  What else is there to do but give up, plop on the couch and browse the internet for cute shoes.  Somewhere in the midst of ballet flats and oxford heels, I remembered that Wardrobe Architect thing.  Web-searching for it was super fast and before you know it, I'm writing a blog post committing myself to at least go through it.  The worse thing it can do is not help, in which case I'm just back here looking at shoes. 

Some of the things asked on the first Wardrobe Architect post that I really identify with:
-You acquire things you don’t use
-You feel regret over purchases, whether it’s fabric you’ll never use or a blouse bought because it was on clearance
-You tend to buy quantity over quality more than you’d like
-You buy things that are “close enough.”
-You have an overwhelmingly long list of sewing projects you want to make and no idea of how to prioritize them
-You feel like your wardrobe is all over the place
-You don’t know how to put outfits together from what you have, so you keep acquiring more instead

Ok, that's almost all of them.  Looks like I might really benefit from this.  ~insert happy dance~  This should be interesting, I have no idea what I'm expecting, if I'm going to see that my tastes have changed, my body shape needs different styles, I am completely missing something from my wardrobe, no clue!  The only thing I DO know is I should go work on that I-don't-like-my-body-fat-to-show-itis disease thingy I have and get some more exercise...  soon.

May 5, 2014

It's a Celebration

Apparently starting a blog was not given a time slot in my calendar because it has not been happening.  I have been kept busy between sewing and work and occasionally sleeping.  Perhaps that's why I received an unfortunately timed cold early last week- one that is enjoying overstaying its welcome!  Today I'm rebelling against the over-abundance of cough drops I consumed all last week (to be able to continue sewing for the wedding that was yesterday) and am on a tea-drinking binge to soothe my exhausted and inflamed throat.  Thank goodness for being able to adjust my work schedule in times like this. 


My friend had her baby shower last weekend.  I love baby showers- all the adorable clothes, cute nursery decorations, enjoying friends company for the celebration, but mostly the anticipation of getting to meet the much-loved baby soon.  This little girl is already so special, it was wonderful being able to rejoice in this new life with her mama.


I knew I wanted to make the Noodlehead divided basket, so I bit the bullet and bought the pattern, not knowing if I'd have time to make it or not.  The night before the shower I decided to put wedding sewing on hold and make the basket.  I'm so glad I did, it's so cute and having made it once, I can only see it getting easier and easier (note: faster) to make.  The construction is genius and the finished product is so professional looking.  My only regret is I didn't follow the grain-line placement on the front pocket and it's quite obvious in the different direction the pattern on the fabric is going on that piece versus the handles and basket divider.  Lesson learned!


The morning of the shower I woke up and decided the baby and her older sister needed some matching clothes.  I only had an hour before I needed to leave to help set up, so I figured what's easier to make than circle skirts?  I used MADE's baby circle skirt pattern and her circle skirt tutorial for the skirts.  I wasn't about to hem circle skirts, even little ones, with my limited amount of time, so I chose the only color of bias tape that I had enough of for both skirts to finish the hems.  I think the result is pretty darn cute, and their mother loves them.  When I was at her house later that week, she was telling me that she almost cried at how little the baby's skirt is.  I think hormonal, pregnant women are adorable, seriously!  Obviously, I've never been through pregnancy myself, but I'm pretty sure I'll always find them adorable.


For the big sister's skirt I had to guess her waist measurement and I guessed slightly too big.  It's about two inches too big for her skinny body.  I haven't decided if I'm going to sew her a new one or put new elastic on the one already made.  Either way, I can't wait to see the sisters in their matching skirts!

Oh, I know I mentioned it at the beginning, but the wedding I was sewing stuff for happened and was beautiful and I am SO happy that my sewing-with-a-deadline is over.  I also finished the maternity bridesmaid dress (since it was for the same wedding) but have yet to get pictures of it (I was exhausted and sick and just didn't care at the time).  That'll have to be another time anyway, cause I need a new cup of tea.

April 9, 2014

A New Kind of Insanity

A friend of mine at church got engaged late last year.  She approached me a couple months ago about sewing some stuff for her wedding, which I laughed about and moved on.  She's very persuasive, because I currently have the fabric she's chosen for her wedding that needs something done to it.  It's not difficult, but there's a lot of uneven, raw edges which must be straightened out and hemmed.  There's probably about 10 pieces total, but some of them are rather lengthy.  Seeing as how her wedding is in less than 4 weeks, I thought I should probably get started.


I have another friend who is going to be a bridesmaid in that same wedding.  She's almost 7 months pregnant and the bridesmaid dress she ordered off of Etsy hasn't arrived, nor can she get the seller to contact her back.  She originally asked me if I would be willing to make her bridesmaid dress (which I laughed about and moved on), but somehow I now have the pattern and fabric for her dress.  


The pattern she choose is not a maternity pattern, and the smallest size it comes in is size 8 (she's a size 2 when not pregnant).  It's New Look 6864 by Simplicity, a choose your size, choose your style type pattern.  I'm not the most experienced or knowledgeable sewist, so there's a lot of prayers going into this! 


Again, these 10 pieces for the bride and the bridesmaid dress for the momma-to-be (for the second time!) are for the same wedding... next month... less than 4 weeks away...  I'm also working my normal job while attempting to accomplish these multiple projects.  I think I'm insane, anyone want to second my opinion?


My goal is to accomplish 3 pieces for the bride and one muslin for the bridesmaid dress each week.  My current (probably inaccurate) calculations is that by keeping with that time-line, I should be able to just add one more piece into the last week to complete the 10 projects for the bride and fit/adjust the bridesmaid dress at least twice (I know, there's a GOOD chance I'll need to do three muslins) before cutting out and sewing the final dress.  


To top it all off, the friend/bridesmaid with baby #2 on the way is having a baby shower the weekend before the wedding and I REALLY want to make something for the sweet baby girl and her adorable older sister.  I've seen so many cute Noodlehead divided baskets (like hereherehere- seriously just go Google it!) and I'm really wanting to buy the pattern and make it for my friend (then fill it with cute baby girl clothes and diapers- of course).  So what does one do when short on time with too many projects?  Start a blog of course!  I officially welcome you to my chaos.

P.S.- Any stories of similiar bouts of insanity are welcome, I would love to be distracted.  LOL